How to setup or manual configure a Yealink IP Phone SIP-T19P, SIP-T20P, SIP-T22P, SIP-T26P, SIP-T28P - This guide has been tested for the following Yealink T19P, T20P, T22P, T26P,
T28P IP phone modelswith the latest firmware versions supported by 3CX
Phone System 12 & 12.5. Please note that different
firmware revisions may have different web interface formats and
functionality. Follow the steps below to manually configure your Yealink
phone.
Configure Yealink IP Phone SIP-T19P, SIP-T20P, SIP-T22P, SIP-T26P, SIP-T28P
1. Start up your Yealink IP phone and identify its IP address. To find your phone’s IP address, simply press the OK key on the phone. In this example we’re going to assume that the IP address of your Yealink phone is 192.168.100.30 and the IP address of the server (or PC) where 3CX Phone System is installed is 192.168.100.2
2. Point your browser to the web interface of your Yealink P series phone, which in this example is http://192.168.100.30
3. Enter your phone’s login credentials – username and password is admin by default
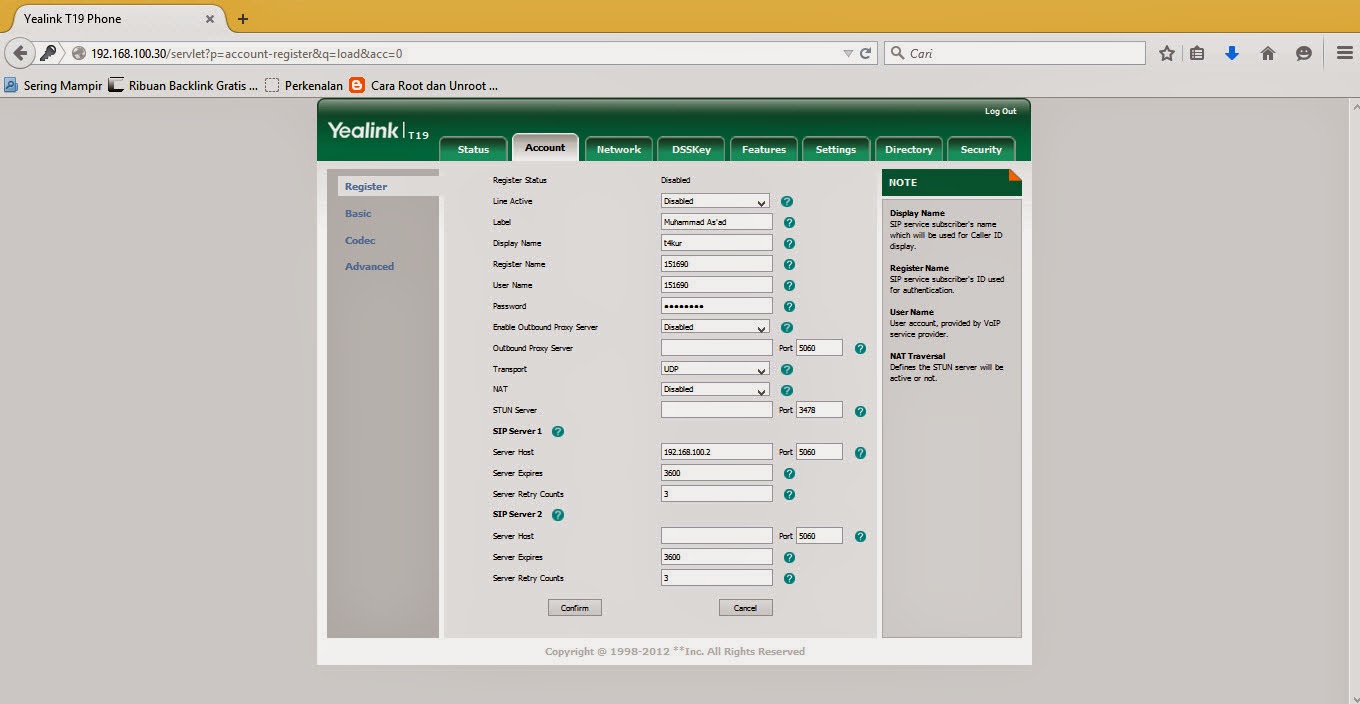
4. Click on the Account tab. You’ll now be taken to the Account configuration page as shown above

- Set the Line Active field to Enabled
- Set the Label field to the name you want to appear on your Yealink’s screen, e.g. Jaymes
- Set the Display Name field to the name you want to appear on another phone’s screen when calling other phones that are connected to your 3CX IP PBX
- Set the Register Name field to the extension number you want to associate with your Yealink phone
- Set the User Name field to the extension’s Authentication ID
- Set the Password field to the extension’s Authentication Password
- Ensure the NAT field is set to Disabled
- Set the SIP Server field to the IP address of the 3CX Phone System machine, which in this example is 192.168.100.2
- Set the SIP Server Port field to the SIP port of the 3CX Phone System machine, which by default is 5060
6. Once you’ve entered all the details in the accounts page click on Confirm and wait until your Yealink phone applies your newly configured settings.

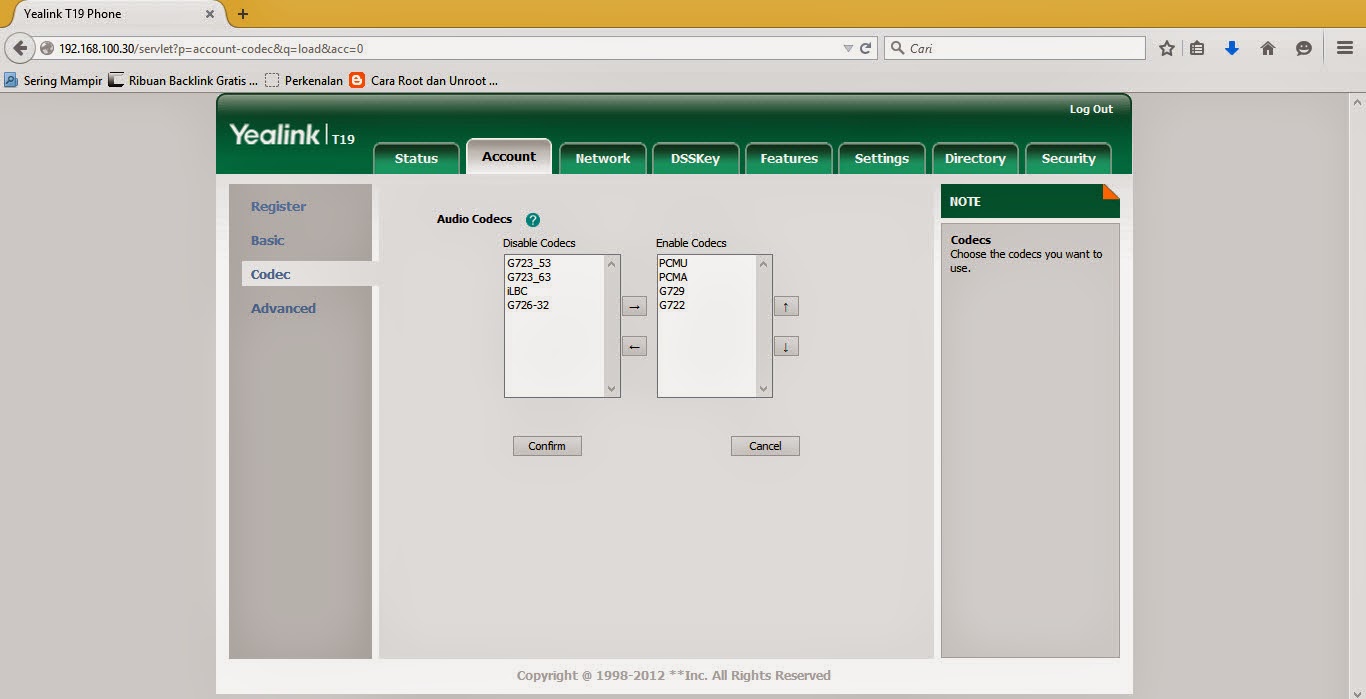
7. Click on the Codec option to your left and ensure that the Enable
Codecs list box contains the following codecs in this order:
- PCMU
- PCMA
- G729
- G722
"If the list of codecs on ip phone yealink aren’t listed as shown above, use the arrow keys to organise them into the above list"
8. When you’ve finished modifying your audio codec priority, click on Confirm. Your phone will now apply your changes
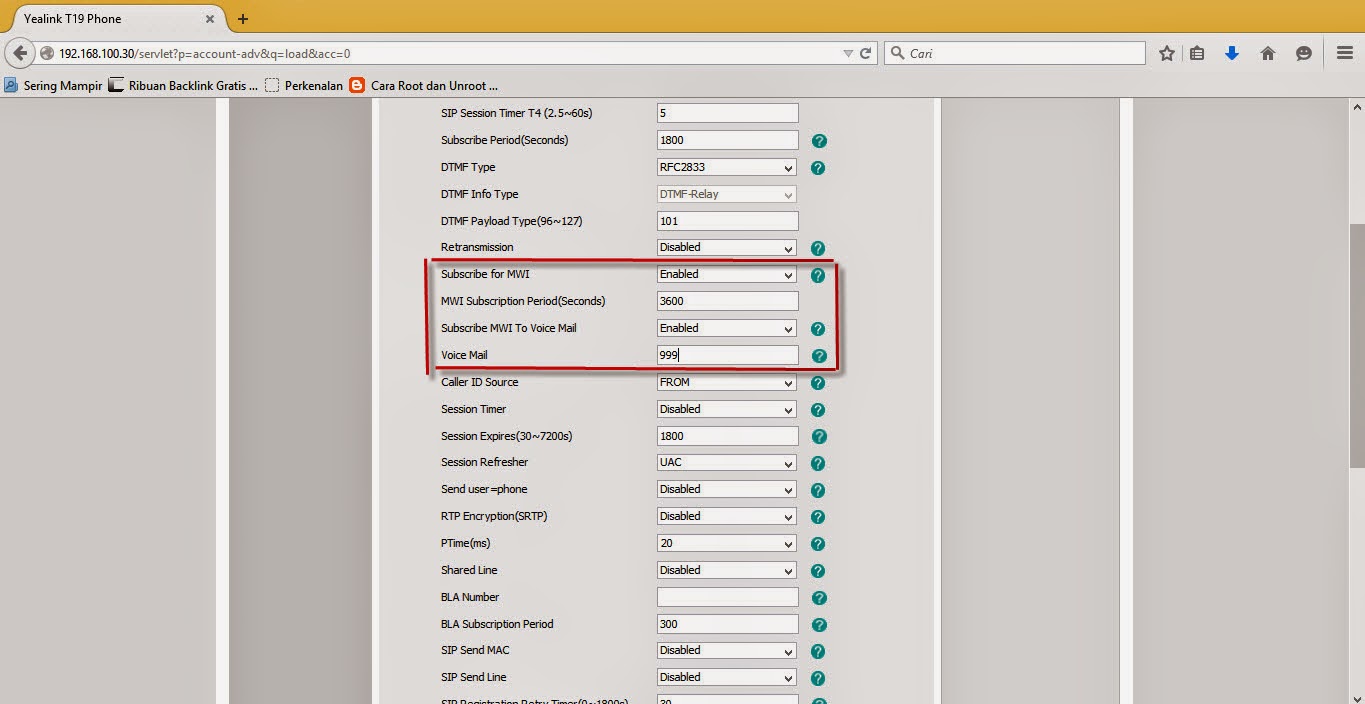
9. We now need to configure the phone to subscribe for MWI (Message
Warning Indicators) and BLF’s. To do that click and expand the Advanced
section side menu:

- Set the Subscribe for MWI field to Enabled
- Set the Subscribe MWI To Voice Mail field to Enabled and set the Voice Mail field to your voicemail number, which is normally 999
- Click Confirm at the bottom of the page. Your Yealink T20P, T22P, T26P and T28P IP phone will now register with 3CX Phone System. You can verify the registration of your phone within the 3CX Management Console by navigating to the Extension Status node
